
Alteryx Tips & Tricks – Part 2
Hello friends!! This is part 2 of the Alteryx Tips and Tricks. You can Check out the Alteryx tips and tricks- Part I here. Received a very good response for the Alteryx Tips and Tricks part I. We’ll be learning few more quick and very helpful Alteryx tips & tricks.
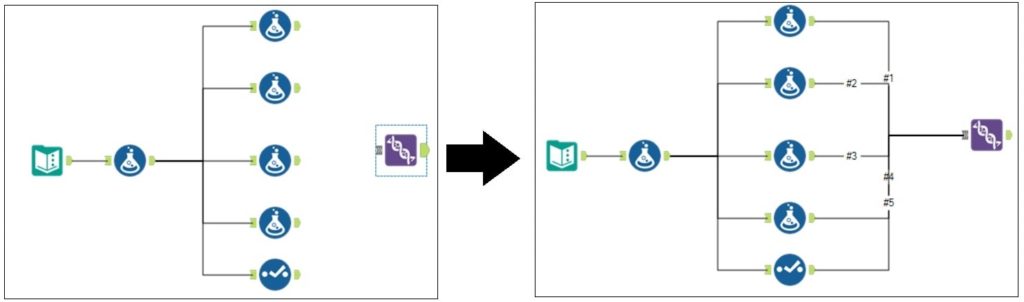
1. Insert After in Alteryx workflow
Suppose you want to insert any tool in-between the workflow with multiple branches as shown in the image below. Here I’ve inserted a formula tool between the workflow and there are multiple branches coming out of it as shown in the image below.
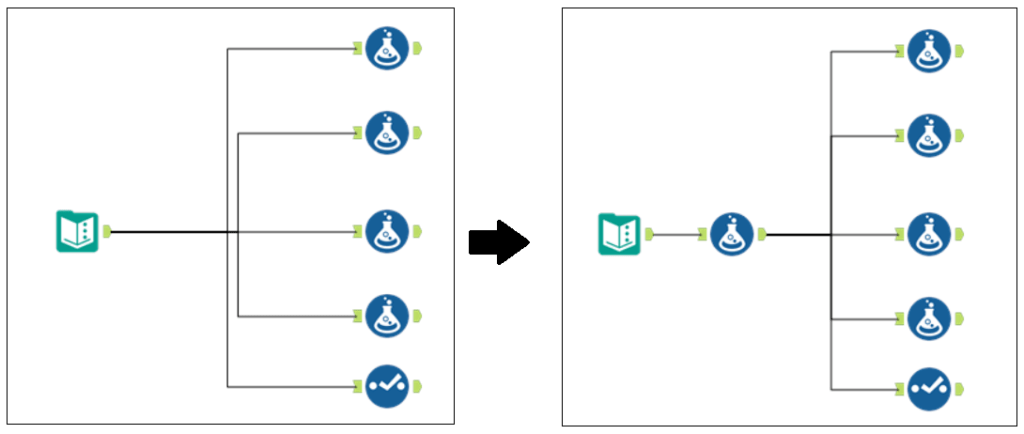
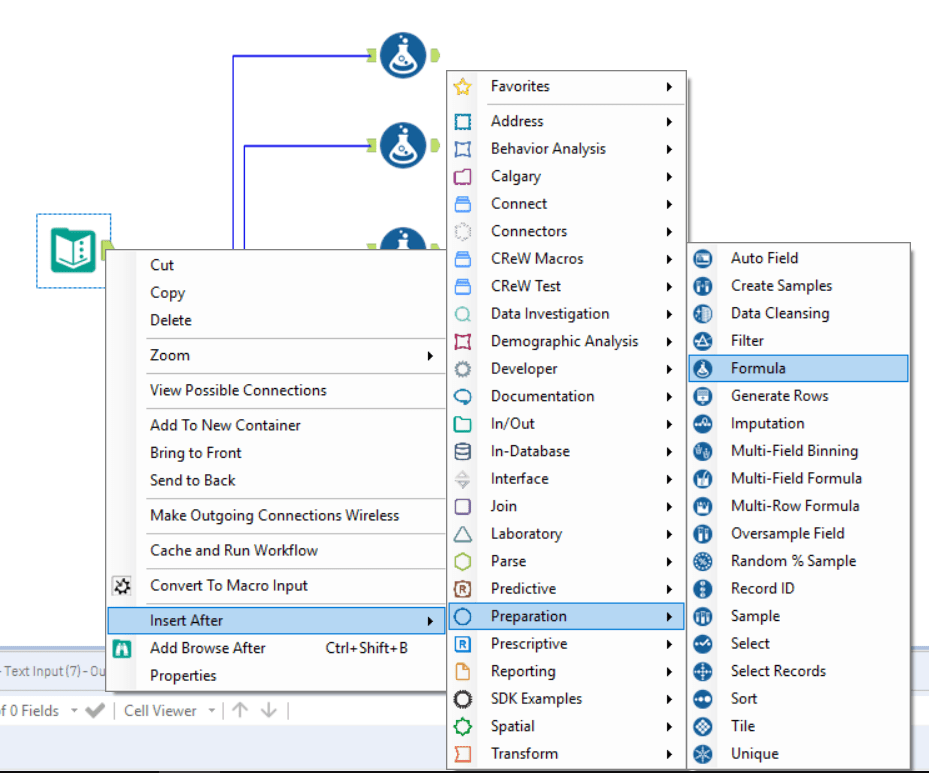
To achieve this you have to right click on the tool after which you want to add the another tool. The method will be: Select the tool > right click on the tool > Select insert After> then select the tool you want to add as shown in the image below. Very simple but very useful Alteryx tip.
2. Delete and Connect Around
This is the opposite of what we saw in the above Alteryx tip. Here we want to delete any tool from the workflow which has multiple branches coming out as shown in the image below. Here I’ve deleted the formula tool from the workflow.
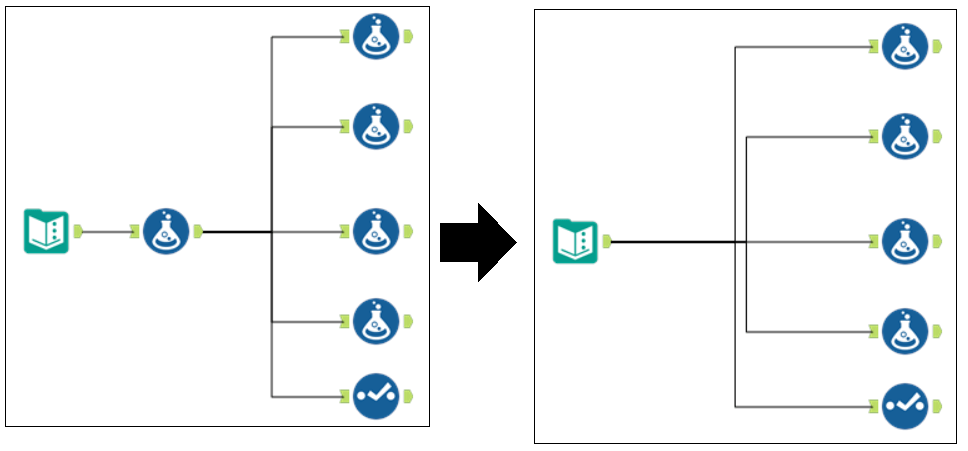
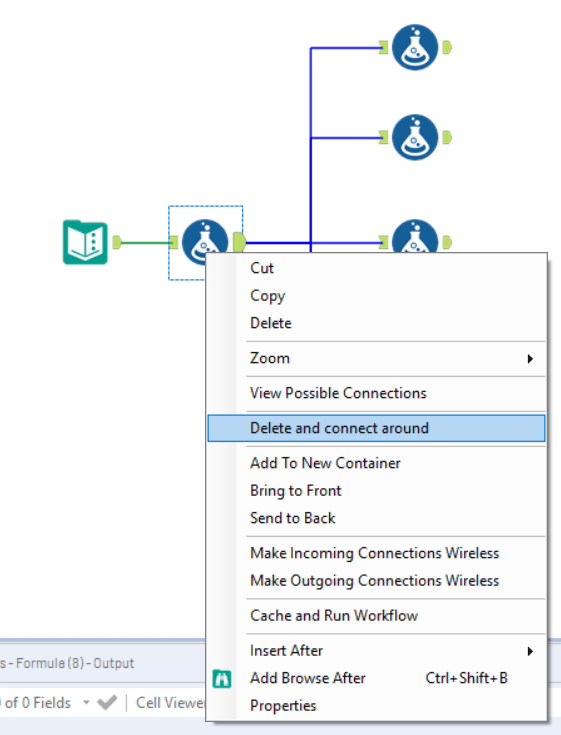
To achieve this right click on the tool you wan to delete and select the delete and connect around option and done. Simple tip and very useful Alteryx tip if you so many connections in the workflow.
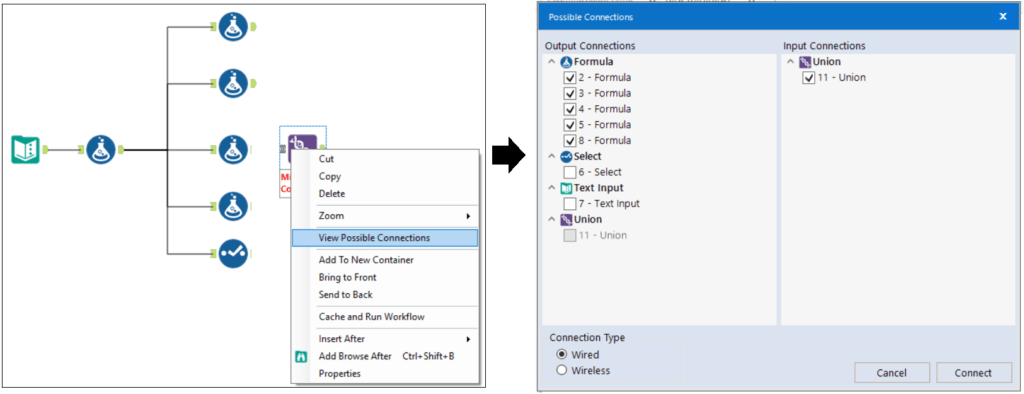
3. View Possible connections
Suppose you have 10 connection to add to union tool in one connecting one by one is very tedious also if you have more connections then it becomes pain as shown in the image below. . So then come the view possible connections option in Alteryx.
To achieve in one step add the tool in the Alteryx canvas then right click and select the View possible connections option another dialogue box will open. There select the Alteryx tools you wan to connect to the Union tool and done. Another useful alteryx tip to save time.
4. Join v/s Find and Replace in Alteryx
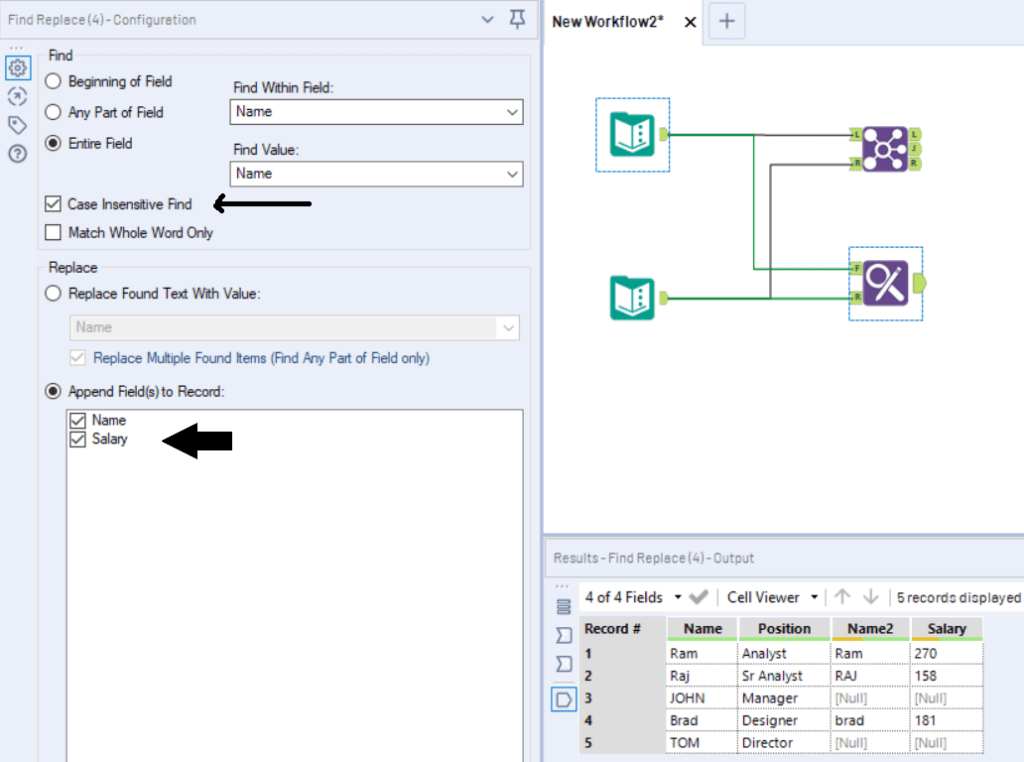
Join is one of the most commonly used tool in Alteryx. There are few limitations like Join is case sensitive so while joining when there is mismatch in the case even if the word/id/key is same it wont come in the join result. Though there are ways to achieve it but with Find and Replace tool you can do directly with few other options. Table 1 and Table 2 shown in the image below.
| Name | Salary |
| Ram | 270 |
| RAJ | 158 |
| brad | 181 |
| Name | Position |
| Ram | Analyst |
| Raj | Sr Analyst |
| JOHN | Manager |
| Brad | Designer |
| TOM | Director |
We have to to join based on Name and as you can see the case difference in the Name. Then we’ll use the Find and Replace tool. Select the Case Insensitive Find and select the output fields/columns you want from the Table 2 and done as shown in the image below and the output window.
5. Disable Output
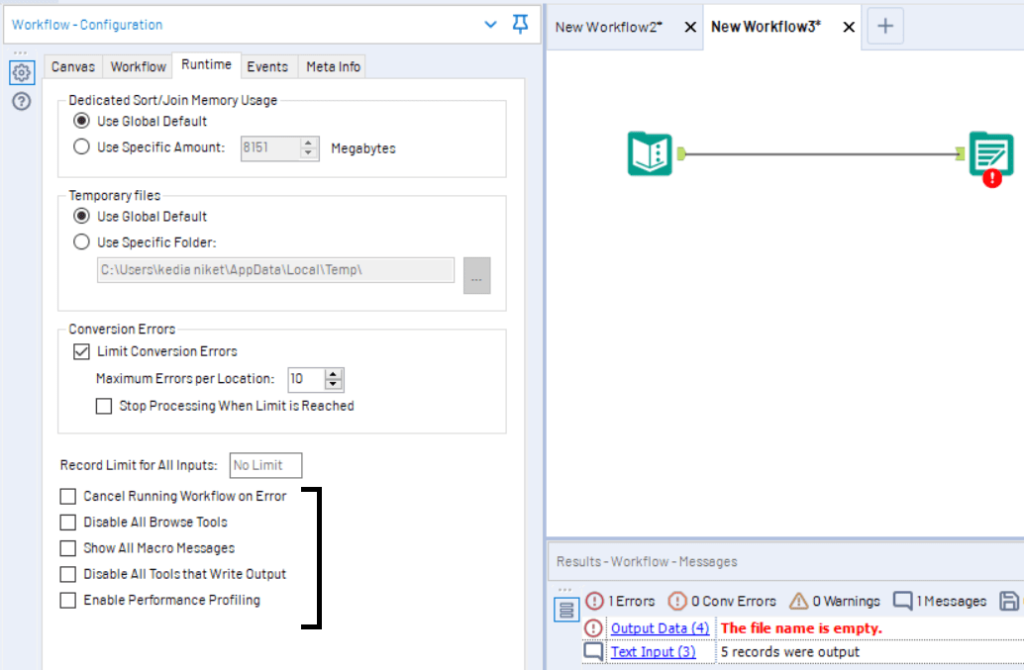
There is super cool feature of Alteryx to disable write output. Suppose you want to run the workflow without writing the output to test your workflow. Click on the Alteryx canvas, you’ll find the option of Runtime on the left side of the canvas and there are multiple option under Runtime as shown in the image below there select Disable all Tools that write output and done.
Keep visiting Analytics Tuts for more tutorials.
Thanks for reading! Comment your suggestions and queries
Pingback: Alteryx Tips & Tricks – Part I – Analytics Tuts